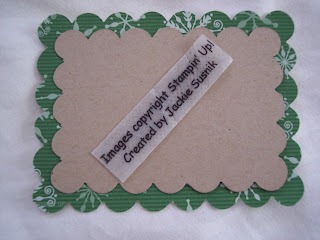
 Today is kind of a tutorial on how to make rectangular scalloped tags and layers with your Big Shot Scallop Square die (page 199).
The finished tag, above, has 2 layered rectangles with scalloped edges. Images from the Merry Details Sizzlet on page 21 of the Holiday Mini were used to decorate the tag. Below are the steps for making one of the scalloped rectangle layers, which is smaller than the Scallop Square.
I will try to line up my text with the corresponding picture, but this is acting "weird", so please match the # on the text with the # on the picture.
1) First, decide how big you want your rectangle layer, and cut card stock or designer paper about 3/4 inch larger to give you some room to play. Position the paper on the scallop square so that 2 sides are beyond the cutting edge of the die, as in #1. Those 2 edges of your paper will be cut on the first pass through your Big Shot.
2) On number 2, you can see that 2 sides of the paper have been cut. Position one of the sides so that the scallops match up to the die (the scallops fit right into the scalloped edge of the Scallop Square die). The edge that you want to cut/scallop is hanging over the Big shot Scalloped edge, so that it will be cut in your next pass through the Big Shot.
3) On Step 3, you have 1 more side to cut. As you can see, I've matched the scallops of the paper "into" the Scallop Square on the left edge and placed the top of the paper above the cutting blade so that the last side will be cut when the die is passed through the Big Shot. What may be difficult to see is that the scallop on the upper right is also positioned in a scallop, so that all the scallops will correspond. This enable you to cut scalloped layers of any size, as long as it fits within the Scallop Square die.
Below are 2 the layers of the tag. The layers work because there is 1 more scallop in the bigger layer.
Happy Big Shotting. Jackie


1 comment:
Great idea! and no "fold" in the middle. Thank you for letting me know about this.
Post a Comment