I will get to posting another project ASAP. I have been busy working on Stampin' Up! projects, trust me!
SU is offering demonstrators the opportunity to get certified in MDS (My Digital Studio). The certification process requires watching webinars, taking quizzes and doing the required MDS "assignments". I've just finished a MDS Multi-Media project, to complete my obligations for this certification!
It's taken lots of hours, but I feel that this process and certification will better enable me to support customers who opt to purchase My Digital Studio. Additionally, I am now looking forward to making some very COOL presents for family members, using MDS.
It is AMAZING what you can do with MDS!!
Jackie
Saturday, October 24, 2009
Wednesday, October 21, 2009
Delightful Dates Calendar
Here are 2 more pages from my Delightful Dates calendar (page 14 of the Holiday Mini). As with my earlier page, these were very quick.
The May month uses the Blossom Party Big Shot die with the Modern Paper.
The December calendar page uses the Ornament punch and Christmas Cocoa Specialty Paper, which I have a hard time putting down!
Happy Hump Day!
Jackie
Monday, October 19, 2009
Gifts of Christmas in White
This set is Gifts of Christmas, on page 37 of the regular catty. It is such an ELEGANT set.
This card builds on the tutorial from yesterday because the 2 scalloped layers were made by different passes through the Big Shot. I used a stenciling tool to make little dry embossed patterns on the scalloped edges. The rectangular panels, were created with the Big Shot and then the dove was gold embossed on the smaller panel. The sentiment was gold embossed on another piece of Whisper White and punched using the modern punch. Everything was mounted on numerous dimensionals to enhance the white layers. The Whisper White card base was run through the Big Shot in the Petals A Plenty embossing folder (page 21 of the Holiday Mini) and wrapped with white organdy ribbon and gold cord from the mini.
Take away the Christmas greeting and this could be a wedding card.
Well, we got Monday out of the way!
Jackie
Sunday, October 18, 2009
Big Shot Layered Tag
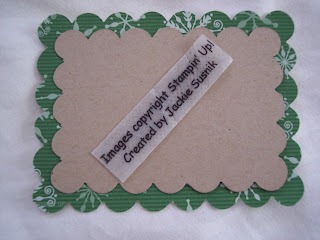
 Today is kind of a tutorial on how to make rectangular scalloped tags and layers with your Big Shot Scallop Square die (page 199).
The finished tag, above, has 2 layered rectangles with scalloped edges. Images from the Merry Details Sizzlet on page 21 of the Holiday Mini were used to decorate the tag. Below are the steps for making one of the scalloped rectangle layers, which is smaller than the Scallop Square.
I will try to line up my text with the corresponding picture, but this is acting "weird", so please match the # on the text with the # on the picture.
1) First, decide how big you want your rectangle layer, and cut card stock or designer paper about 3/4 inch larger to give you some room to play. Position the paper on the scallop square so that 2 sides are beyond the cutting edge of the die, as in #1. Those 2 edges of your paper will be cut on the first pass through your Big Shot.
2) On number 2, you can see that 2 sides of the paper have been cut. Position one of the sides so that the scallops match up to the die (the scallops fit right into the scalloped edge of the Scallop Square die). The edge that you want to cut/scallop is hanging over the Big shot Scalloped edge, so that it will be cut in your next pass through the Big Shot.
3) On Step 3, you have 1 more side to cut. As you can see, I've matched the scallops of the paper "into" the Scallop Square on the left edge and placed the top of the paper above the cutting blade so that the last side will be cut when the die is passed through the Big Shot. What may be difficult to see is that the scallop on the upper right is also positioned in a scallop, so that all the scallops will correspond. This enable you to cut scalloped layers of any size, as long as it fits within the Scallop Square die.
Below are 2 the layers of the tag. The layers work because there is 1 more scallop in the bigger layer.
Happy Big Shotting. Jackie

Subscribe to:
Comments (Atom)


